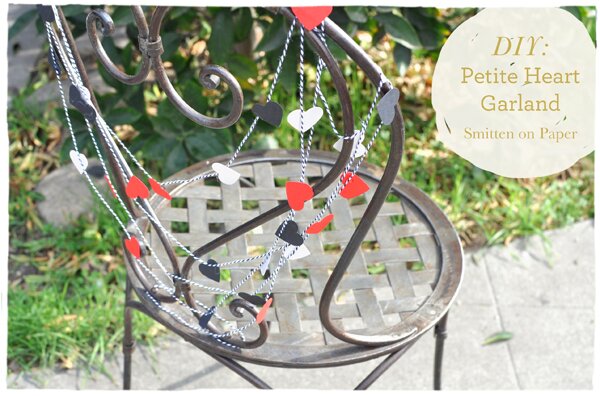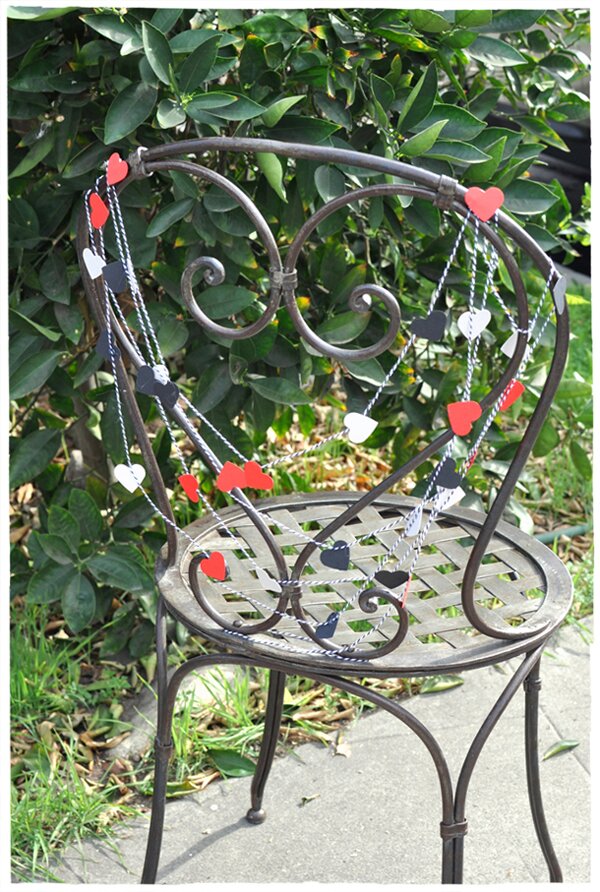
Looking for a super easy Valentine’s Day decoration that you can whip up with things you probably already have around the house? If so, you are in luck because today we have a sweet + petite DIY heart garland for you from Smitten on Paper!
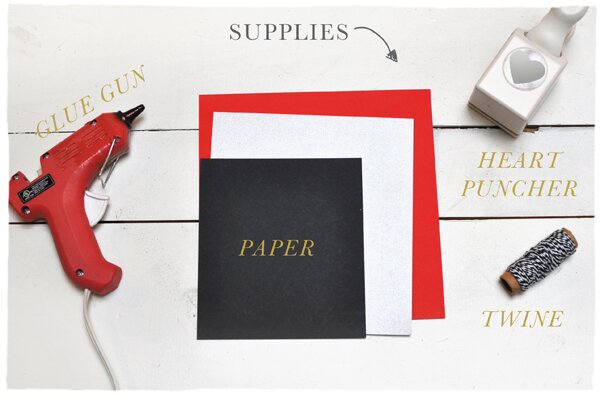
Supplies:
Twine
Cardstock Paper
Heart Hole Puncher
Glue Gun
Steps:
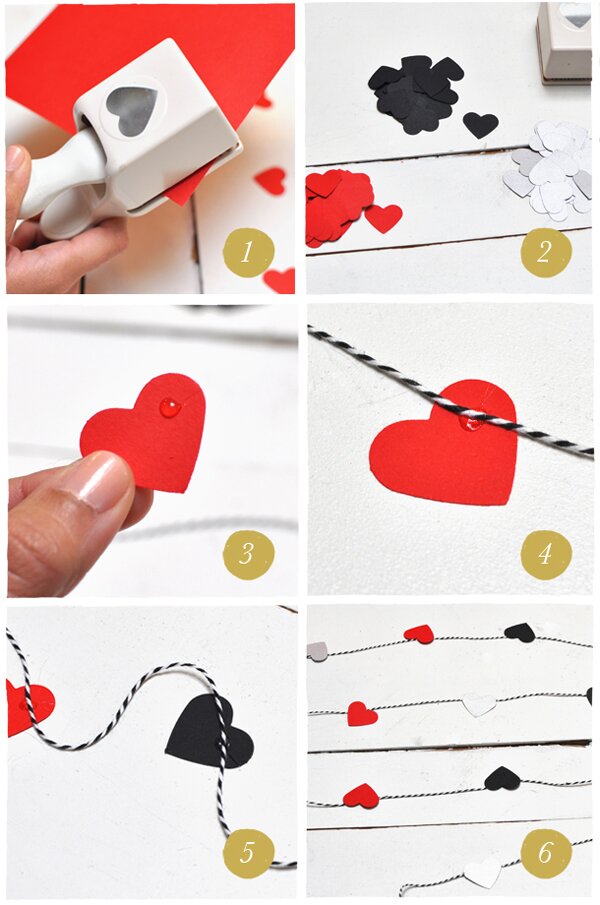
1. Using the heart hole puncher, hole punch your paper about 10-15 times.
2. After I’ve hold punched the red paper, I continue on hole punching the rest of my paper colors.
3. Taking the first hole punched heart, apply a dot of glue.
4. Adhere the heart to your twine. My twine measure about 150 inches, I wanted a long garland, but it all depends on your desire length.
5. Start adhering the rest of your hearts, making sure that they are about 2 inches apart.
6. Tada! once you have applied all your hearts, your left with a romantic looking garland.
Smitten on Paper is running a promotion right now for 10% off your wedding invitation suite using the code ‘HOORAY10′!

I can’t believe Thanksgiving is next week! Is it just me, or is the holiday season absolutely flying by this year? Well, before it turns from fall to winter, I have another awesome fall appropriate DIY for you from Smitten on Paper! These sweet twine wrapped table numbers would be great for a wedding any time of the year, but there is a rustic appeal about them that I think makes them especially perfect for fall.
Supplies:
Fresh Cut flowers
Twine/cording
Glue stick
Glue Gun
X-acto
Thick cardboard
Table number print out
Steps:
-Print out your desired table numbers, making sure they are the perfect desired size.
-Using a glue stick, lightly coat the back of the printed sheet and place over the cardboard. This is to ensure the sheet will not move when tracing and cutting over the cardboard. Then let dry.
-Using an X-acto, trace over the number, cutting through the cardboard.
-When your number is finally all cut out, peel back the sheet of paper.
-If your table number has any paper residue left over, not to worry, this will be covered up by twine and will not show through. So now, at the top, tie a knot. This will be your starting point when wrapping.
-Wrap, Wrap, Wrap!
-TADA. Your table number is now ready for beautification.
-Using a glue gun, carefully apply the flowers where you feel they are suited best. And done!
Smitten on Paper is currently offering 30% off all their holiday cards. I got mine from them this year and they are super cute, so don’t miss out on this great deal!

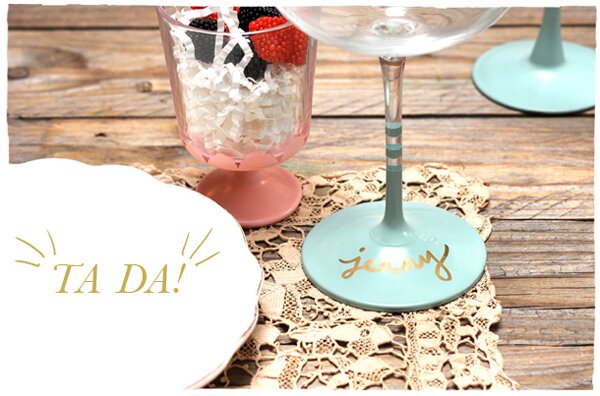
We are back with another adorable DIY project from the creative and fantastic folks over at Smitten on Paper! This time it’s a multi purpose escort card/glass for your wedding guests. Ch-ch-check it out!
Directions:
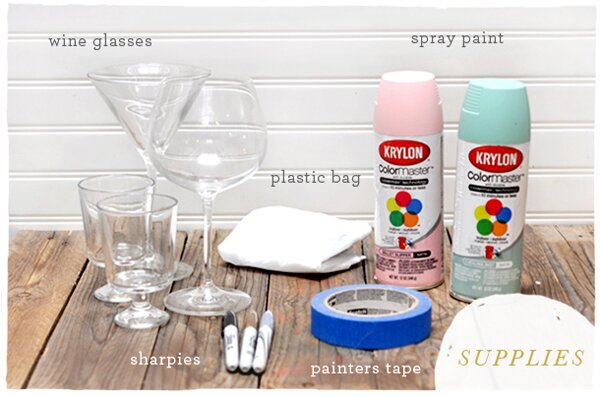
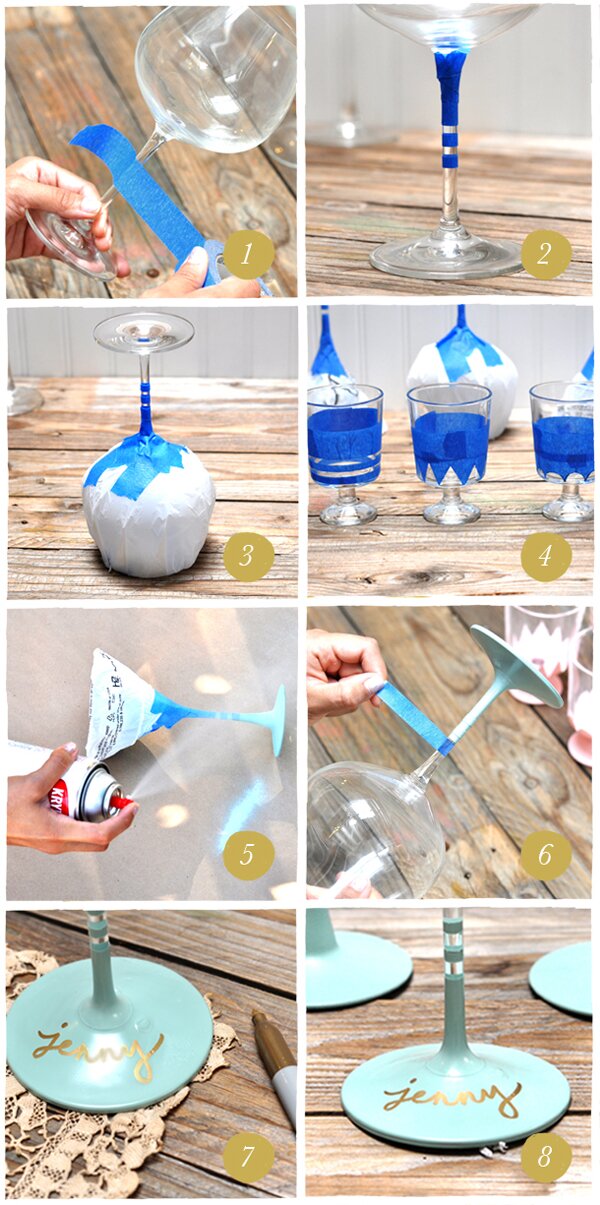
1. With painters tape, begin taping sections that you wish the spray paint NOT to come in contact with the glass.
2. See sample; we thought painting the base would be nice.
3. Turn upside down and with a plastic bag, cover the whole mouth of the glass. This will protect the glass and keep it from getting paint on it.
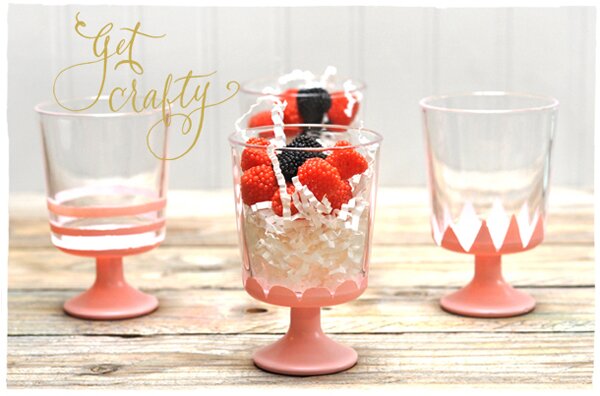
4. Get creative! With tape, we made cute designs for our dessert cups.
5. Once all your glasses are fully covered, evenly spray coats of paint, making sure to spray away from you. This is better if preferably done outside.
6. Let your paint dry and then carefully peel back tape.
7. With a Sharpie (We chose gold!), write the guest name at the base of the glass.
8. Ta Da! Let dry and all done.
Super easy DIY, all you need is a little time and creativity! The spray painted glasses are so chic and versatile, they work both as a pretty escort card and/or decorative piece for any event or wedding. In this DIY we used them as escort cards and as adorable dessert glasses. Get creative with it! There are a billion uses. Enjoy!
Make sure you head over to Smitten on Paper and check out what they have to offer. Also, don’t miss out on the awesome 20% off promotion they currently have running for their adorable holiday cards!

Happy Monday! I have another adorable DIY project from Smitten on Paper to share, and it’s perfect for this sunny Summer day.
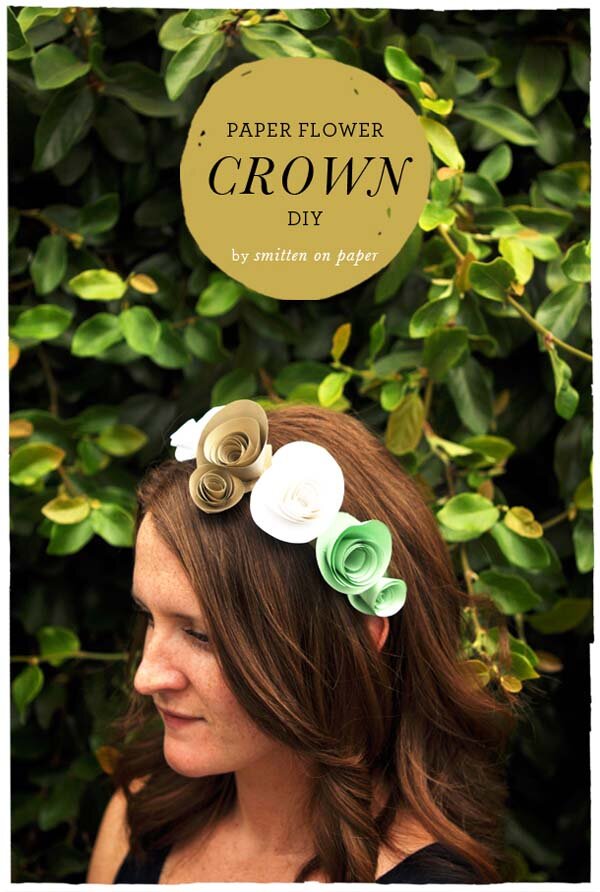
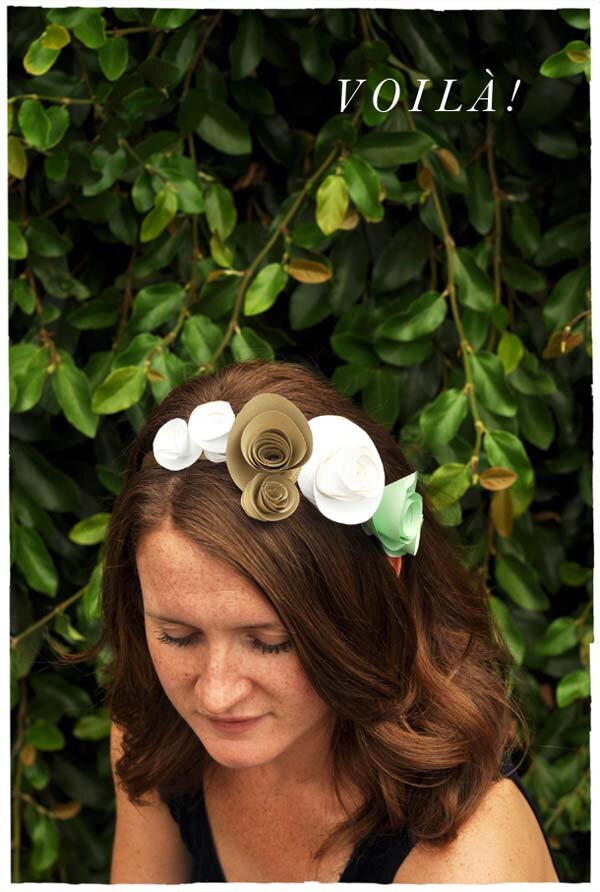
This paper crown is so simple and can be made on the fly with things you probably already have laying around your house. I love the palette of kraft, mint and white they used, but you can use any color combination you prefer!
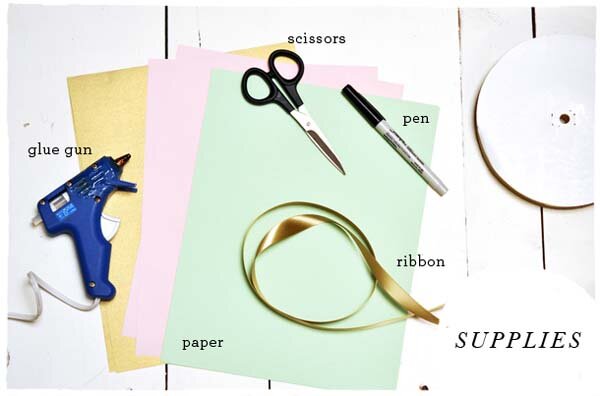
Supplies:
Paper, Scissors, Glue gun, Pen, Ribbon.
Directions:
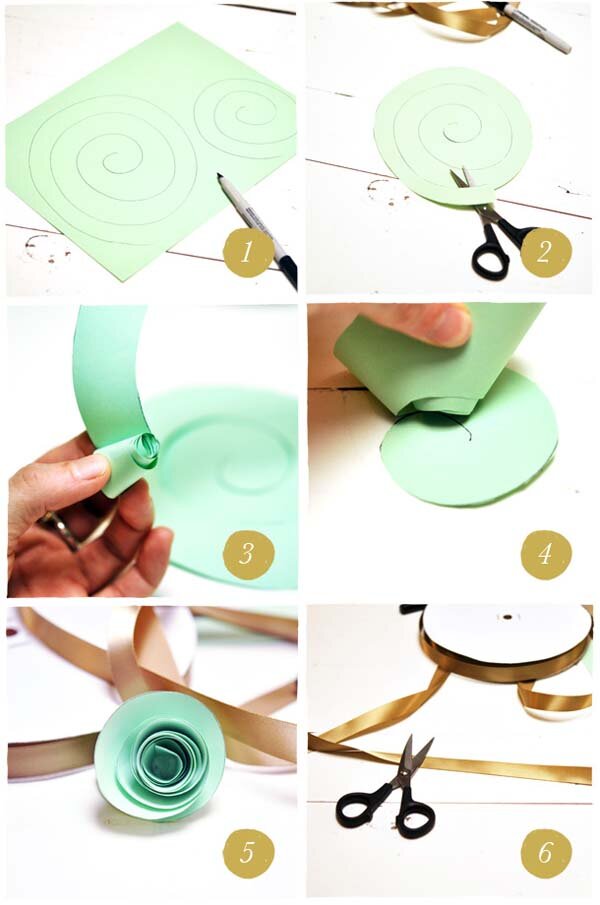
1. Draw a spiral on your paper.
2. Cut along the spiral line (it doesn’t have to be perfect or precise).
3. From the outer end, begin to roll the paper around itself until you get to the center.
4. Once you roll all the way to the center let the paper unroll slightly, settling on it’s own. Place a dot of hot glue onto the bottom center of the spiral and stick the rolled paper down.
5. Repeat with as many flowers as you would like on your crown.
6. Cut a length of ribbon that will fit around your head with enough room to tie a bow. Glue your paper flowers onto the ribbon to complete your crown!
This easy and whimsical crown would be perfect for a bridal shower, bachelorette party or even just a fancy day! Enjoy!
Smitten on Paper is currently offering 15% off wedding invitations through July 31st with the code “SUMMER15″- don’t miss out!


