I have a deep unflinching love for mercury glass that is around all year long, but especially at the holidays. My colossal collection of mercury glass is currently adorning our house, hiding in every nook and cranny, and I am in heaven! It pairs beautifully with so many colors, but one that I am especially loving lately is mercury glass paired with mink. The browny, pinky, greyish tones next to the cool subtle metallic of mercury glass gets me every time!

Two of my favorite shades- the sophisticated greige, which is a combination of grey and beige, and the light and flirty sherbet. I think this is a lovely combination, and would make a gorgeous wedding palette.

While we were on vacation in Mexico last month, I discovered a new found love for otomi textiles. I picked up a table runner in grey, and a pillow case in the most gorgeous coral shade. The table runner is currently adorning our entry table, and the pillow case is soon to be framed and hung up, so I can swoon over it daily.
These breathtaking textiles are handmade by the Otomi Indians from Hidalgo, Mexico. Each piece can take up to a month and a half to be hand embroidered onto the muslin fabric. The designs are inspired by ancient cliff paintings from the region.
The pieces range from $80 to around $500, depending on the size. Well worth it for the craftsmanship!
If you’re not heading down to Mexico anytime soon, no need to fret! You can purchase your own stunning otomi textiles from several sources. L’aviva Home, Jacaranda and Mexican Textiles Museum Store.
I think the otomi designs would make a perfect motif for a Mexican wedding! From the paper goods, to table runners, and more.

Hi Blogettes!
My name is Rhi and I blog over at Hey Gorg. I’m so honoured to be guest blogging for one of my faves while she is on vacation enjoying some serious rest and relaxation; hope you are having a wonderful vacay Melis! For my post I wanted to share a fun little DIY my girlfriend and photographer extraordinaire, Jenna McKenzie made together. I found the idea via Good Housekeeping for Halloween decor but thought this DIY would be perfect for weddings, showers, and especially, nurseries. It’s easy, fun and super cute so read on to find out how you too can make your own Dixie Cup Light Garland.
{Supplies}
a pack of 100 Dixie Cups
scissors and an Exacto knife
scrapbook paper in desired colours
white Christmas lights (LED is best)
double sided tape
a pencil
{Process}
Cut apart a Dixie Cup and lay flat on a piece of paper. Carefully trace the outline of the cup and make your light ‘shade’ cover template. You may need a few trial runs to get it right!
Trace your template onto your scrapbook paper (making approximately 30 – 50 light ‘shade’ covers like I am holding in the one photo) and cut them out.
Using your Exacto knife, make an X shape slit in the bottoms of the Dixie cups. Pop in each individual bulb until each light is covered with a shade.
Plug in and voila! A gorgeous DIY light garland! Be sure to keep an eye on the garland when it’s plugged in if you are NOT using LED lights; they will get hot!

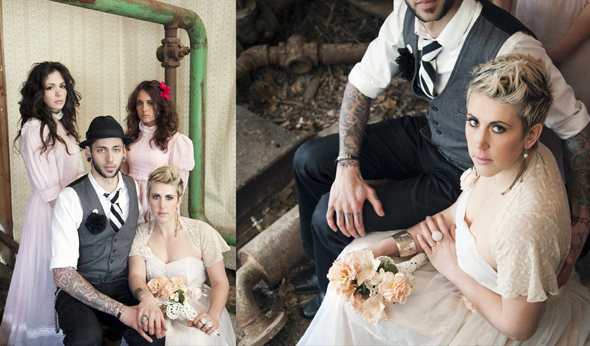
This shoot, led by Carmen of FRESH Photography, has a bit of a wild edge to it, which I love! She created a storyline for the shoot that includes a non-traditional couple, a cabin in the woods, and slightly feral looking bridesmaids. While that combo could have come out totally Blair Witch, with the talent involved, the end result was absolutely beautiful!!!
from on .
Vendors:
Photographer + Stylist: FRESH Photography
Videographer:
Makeup Artist: Tamer Vockeroth
Hair Stylist: Heather Bartlett
Cake: Sweet Dreams Cakery
Quilt: Tapestri


