


A classic, and beautiful color palette- honeycomb + black.

Related Posts


BACK TO TOP
Minted is my go-to resource for invitations and cards. They never fail to have a great assortment of designs that are fresh, creative and fun! With a focus on great design, quality, and uniqueness, they always seem to hit the nail on the head.

Minted was kind enough to extend an awesome giveaway to all of you lovely readers. 75 free flat wedding invitations, a $198 value!!! Their collection of unique wedding invitations is well curated and extensive. The designs are all sourced from independent designers who enter the design challenges that Minted holds.
I was able to review several samples, and I can tell you first hand, you will not be disappointed!

In addition to wedding invitations, they also offer wedding programs, save the dates, thank you cards, social stationery, and some of the cutest holiday cards around!

To enter:
- Visit the Minted website
- Leave a comment here sharing your favorite wedding invitation design
- For a second entry, tweet about the giveaway (be sure to include a link to this giveaway, @theloveliestday and @minted in your tweet) and leave a separate comment on this post linking to your tweet
The winner will be announced next Thursday, September 22nd. All entries must be made by 11:59 pm PST on Wednesday, September 21st.
Related Posts


BACK TO TOP
I absolutely love the sweet simplicity of Whitney + Rob’s day after session, captured by the always wonderful Amber of Live It Out Photography. There is a peace and serenity that comes through in these images, and I just can’t stop looking at them! Whitney’s beautiful dress is from the BHLDN collection, and her veil, which I think is the bees knees, is by Twigs & Honey.
A bit more about this shoot, from their photographer Amber:
Whitney and Rob wanted this shoot to capture the simplicity of their long-distance beginning, so we avoided props and chose minimalistic (but meaningful and tender) settings; their front porch (with their next door neighbor’s cat peeking through the front door) and a few local places (an overgrown field and a dilapidated building.) In the end, we wanted to beautify tired, forgotten (some might think, ugly) places with Whitney + Rob’s life and love and spark. Just two newlywed kids and their love and this old, sleepy town.


Related Posts


BACK TO TOP
Psychedelic Biker Wedding Shoot DIY…
We are back today with some of the DIY projects from our Psychedelic Biker Wedding Shoot that was shared yesterday here, and on Green Wedding Shoes!
Looking back, I wish I would have taken step-by-step photos for each of these, but in the rush of getting everything finished, I totally failed on doing that. Next time, I promise! But, I still want to give a few instructions on how to recreate some of the decor you saw in our shoot, starting with the chalkboard menu…
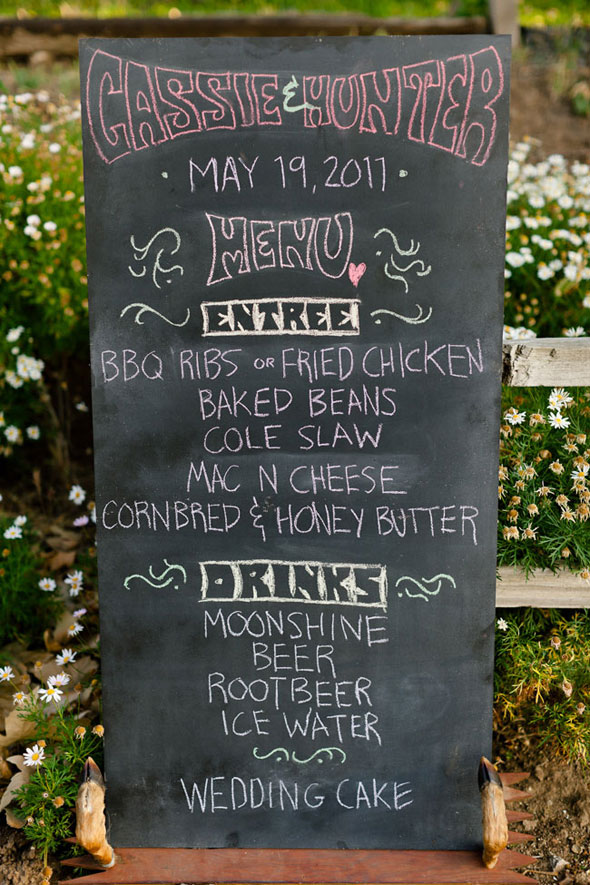
This one is truly simple! Head to your local hardware store and either pick out a pre-cut piece of wood, or get one cut to size. Prime it with a good primer, I use , and wait for it to dry. Coat with a few layers of , I did 4 layers to make sure the white primer I used was totally covered. Wait 3 days, maybe a bit more if you are painting in damp conditions, then cover the board completely with chalk to get a good dust coating, and erase. Now you are ready to go!
Use it for a menu like we did, for your seating chart, welcome sign, or anything else! I used some mounted deer legs my husband had to prop it up, but can simply lean it against a wall, rail, tree, etc. or come up with your own stand.

We wanted to create a unique table top, and were super inspired by the album cover above.
We pulled elements from this album cover to inspire a lot of our design from the shoot, including the table top. We wanted to emulate the look of the folding screen on the album, so I found an awesome fabric with bright, bold colors and a psychedelic pattern, and Melissa of Pow Wow Vintage Rentals created the super rad custom cut-out panel.
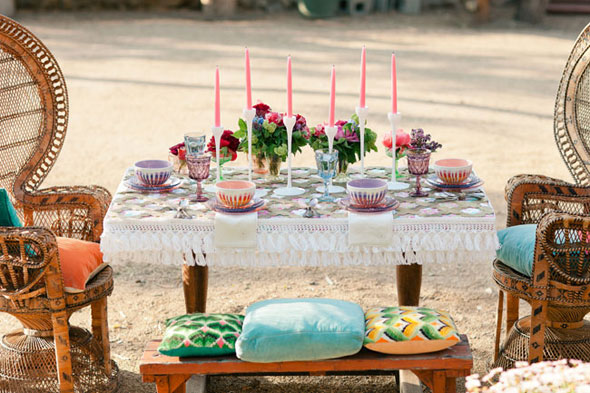
She took a sheet of plastic garden trellis, and used a dremel tool to make the notches that created the pattern we wanted. This would obviously take some skill and time, but I loved that she made something so special out of relatively cheap materials. Afterwards, she spray painted the whole thing a burnished gold.
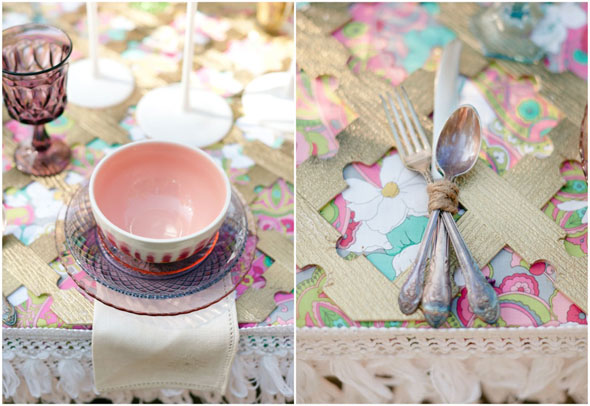
When putting the table together, we laid down the fabric and attached it under the table edge. The edge of the table was adorned with two layers of white fringe trim, the panel was laid on top, and voila! You could also attach the fabric to the panel if you’re unable to attach to the table directly. Even before the flowers, or plates, or candle sticks were put down, we had a table top overflowing with visual interest.

Next is the dreamy cake set-up (on a transformed gallows of all places)!
The flowing fabric tied around the side beams was simply ripped into strips, and tied on. You could use any kind of fabric you want, it’s incredibly easy! Just cut a little starting point with your scissors to make the fabric rip more easily.
The platform was layered with loose pieces of fabric and white fur rugs. I love the texture it gives, and is a great way to temporarily cover up an area that may be less than pretty looking. Fabric remnants are probably the cheapest way to go about it, and they can be re-used for something else later since they don’t need to be cut. An assortment of rugs would also look awesome!
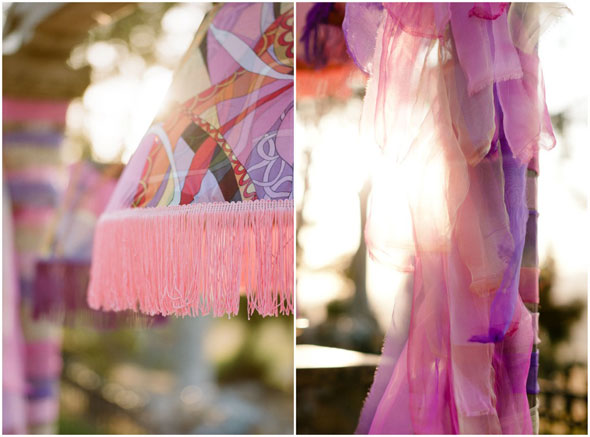
For the lanterns, I bought a few cheap lampshades in differing shapes/sizes, and found a fabric I wanted to cover them with. I simply cut out the fabric and laid it over the lanterns. I made sure there was enough fabric to tuck under the openings on the top and bottom of the shade. I started by hot gluing the fabric ends in the top opening of the lamp. Once they were secured, I started gluing the bottom ends up, making sure to go slowly and keep the fabric ends pulled taut to avoid creases in the fabric. Once it was all glued, I cut out the trim, and hot glued it around the bottom. Since the fabric I used was sheer, I had to cover the shades in two layers so it would be opaque enough. If you are using an opaque fabric, one layer should be perfect!
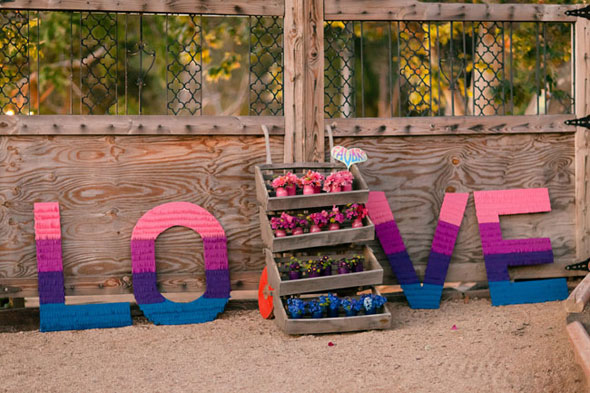
Lastly, the giant fringed fabric LOVE letters. These are pretty simple to make, but take a looooong time! I think the result is worth it though:)
I chose to use a gradient of colors that matched the custom fonts on our paper goods. This made it more complicated than making them all one color, but I love how they turned out. First, choose a font you like, type out the letters you want to use in the largest size you can, then print out(I had one large letter printed per page of paper). Take measurements of each part of the letter, than calculate those dimensions to the size you want your letters to end up. The ones I made were about 4 feet tall. Once you have the dimensions, draw the outline of your letters in pencil on large sheets of cardboard. I used a yard stick to make sure my lines were straight, then cut them out with an x-acto knife.

From there you need to figure out your fabric placement on the letters. Depending on how many different fabrics you are using, use a ruler to make marks of where you want each fabric to start and stop on the letters. I cut my fabric out one strip at a time, so I could measure it and be less wasteful since the letters will require different size strips in different parts. Once I had the strip cut out, I used fringe scissors to cut a fringed end. Start from the bottom of each letter going up, and glue the strips down with hot glue. I cut the strips a bit longer so I could glue them down and fold them over the sides. Make sure to overlap each strip a bit so that the cardboard doesn’t show through.Keep gluing until you are done!
I hope these instructions helped for those of you wanting to try some of these DIY projects! Next time, I will have step-by-step photos as a visual aid:)
Related Posts
BACK TO TOP
While we were on vacation in Mexico last month, I discovered a new found love for otomi textiles. I picked up a table runner in grey, and a pillow case in the most gorgeous coral shade. The table runner is currently adorning our entry table, and the pillow case is soon to be framed and hung up, so I can swoon over it daily.

These breathtaking textiles are handmade by the Otomi Indians from Hidalgo, Mexico. Each piece can take up to a month and a half to be hand embroidered onto the muslin fabric. The designs are inspired by ancient cliff paintings from the region.

The pieces range from $80 to around $500, depending on the size. Well worth it for the craftsmanship!

If you’re not heading down to Mexico anytime soon, no need to fret! You can purchase your own stunning otomi textiles from several sources. L’aviva Home, Jacaranda and Mexican Textiles Museum Store.
I think the otomi designs would make a perfect motif for a Mexican wedding! From the paper goods, to table runners, and more.
Related Posts
BACK TO TOP
It makes my heart flutter when couples include truly meaningful places or props in their engagement sessions, and that is exactly what Scott and Nicole did! Scott is an avid surfer, and the couple spent many long days at the beach playing and soaking up the sun. When it came time to ask Nicole to marry him, Scott chose the beach they had spent so much time at as the location for the proposal. It made perfect sense to head back to that same beach for their engagement session, shot by the awesome Studio 28 Photo! They wanted to incorporate another special element as well, the vintage Mustang that had been in Scott’s family since it was brand new. The same Mustang that served as the getaway car for his parents wedding! So instead of playing around in the sand, they shot in and around the parking lot and train tracks right above the beach. A new special memory to add to the books!


Related Posts


BACK TO TOP
I love decor elements that are simple and affordable to create, but make a beautiful impact. Sweet + simple, like these gorgeous hanging baby’s breath poms. Simply get a an oasis sphere, wire stems of baby’s breath together, insert, keep filling in until the sphere is fairly tightly packed, then hang and enjoy. Voila!

Related Posts
BACK TO TOP


